You Have Photos, Now What?
Part 6
unlike the first group of film, where I’d be sloppy with unloading the cameras, I’d done well this time. taking care in unloading them had preserved many of the photos inside. now I suffered an embarrassments of riches. I had a lot of images and no clue what I was going to do with them.
if you’re lost or find yourself in an unfamiliar predicament it’s a good idea to stop and assess the situation. I decided the first order of business was to get an overview of the photos I now possessed. I wanted actual physical copies of the photos so I could look at groups bigger than a computer screen would allow. but since these were all new-to-me pictures, I thought that tracking them might be a bit of an issue, so I employed a technique from my work as a film editor. when you get a new batch of footage, it often has the shot and take number visible on the video just like the name of an actor is visible in the credits. this is called a “burn in” and allows you to know what exactly what piece of the project you are looking at.
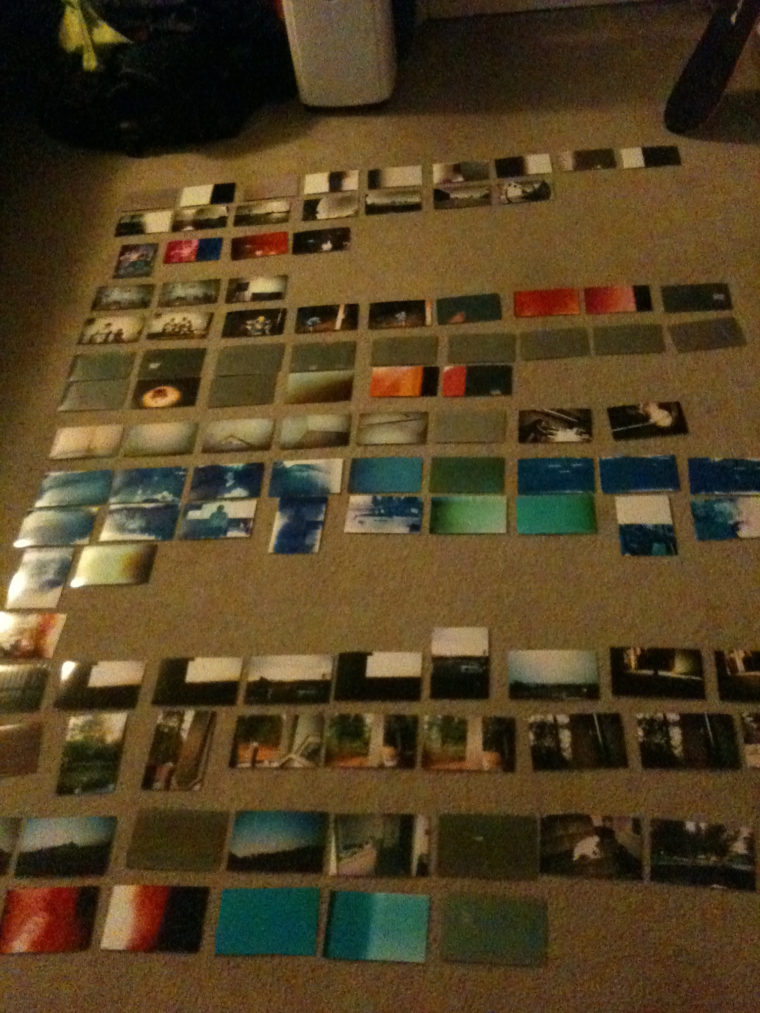
I opened the images in photoshop and added a “file name title” onto each. then I uploaded them to CVS for prints. once I had the prints I spread them out over the floor of my small apartment. I had so many photos (and such a small apartment) they couldn’t be displayed all at once… as I looked at the images, I was struck by how “normal” the photos were; they were people’s snapshots. most were not particularly well framed or well lit or unique in subject matter. it was mostly a mix of kids, pets, and parties. but there were some images that stood out. in some the aging and degredation of the film stock had an extra element that took a poorly composed image to something fascinating and beautiful. in others, the entire photo had vanished, leaving abstract images filled with great washes of colors and shapes.
a short science lesson: film is a photochemical, organic process. in the most simple of terms, a chemical mixture (silver halide) is held in a organic emulsion (gelatin) that when exposed to light, moves around to form an inverse reflection (negative) of what is in front of it. additionally, the emulsion has three layers: red, green, and blue which each react to a different spectrum of the light. when these are all combined it creates a color image. the fact that the colors are actually physically different parts of the film is important because – as the film is affected by light, heat, or other aging factors the different colors can be changed, sometimes independently of each other.
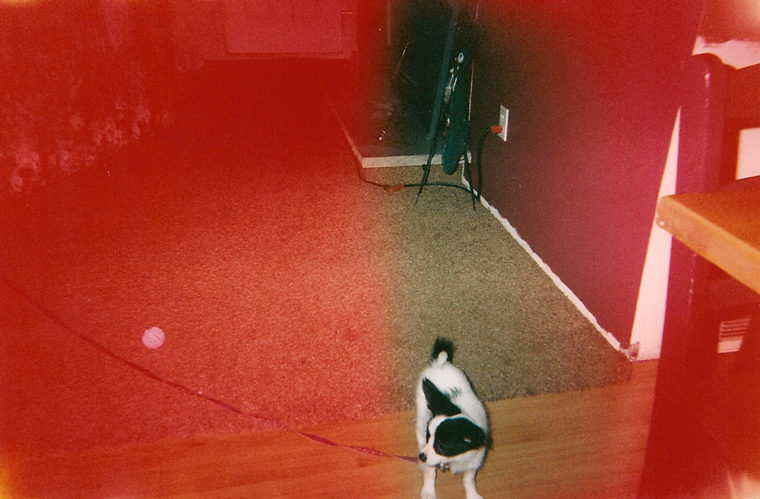
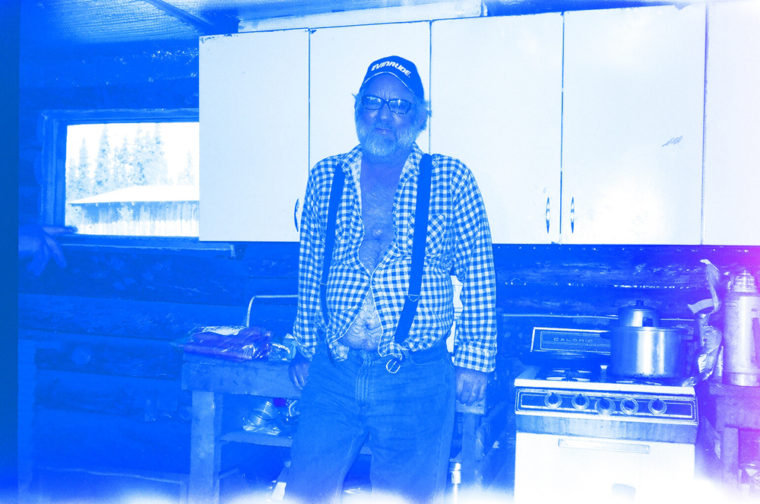
I know this is a bit to take in, but the practical application of the idea is pretty easy to see. for example, here’s an image where the red layer is more prominent and another where only the blue has remained. I’m not a chemist, or really that knowledgable in the science of how film works – so I can only speculate on how this happened. but my guess would be that the red images got “flashed” that is, film was exposed overall – but just a bit. while in the blue photo, the red and green layers of emulsion degraded leaving only the blue. but again… this is just my guess.
okay, back to the project. my next step was to pick out selects. I cut post-it notes into strips and began to affix them to my favorites. I re-sorted, rearranged, and picked more. then I laid out my selects took a look at them. I had a group of favorites, but what was I going to do with them? this was all new territory for me.
I found myself struck by the potential scale of this project. if there was this many photos just from Kitsap County, the thought of how many more around the USA was overwhelming. my mind drifted as I imagined searching for cameras for years all across the country. as romantic as it sounded it would also mean years until the project was done. not only that, but this wasn’t film… I’d been working toward my goal of being a full-time filmmaker and leaving that pursuit for a memory treasure hunt didn’t seem like the best play. but there was something here. something of interest and value, as long as I could figure out the scope.
it didn’t take me too long to arrive at the solution; I’d keep the project focused on my home county. all the photos would have to be found in Kitsap. (see what I did there?) the more I thought about it, I realized this restriction spoke to larger themes I was developing. by focusing on one area, I left open the question, “what is waiting to be found in my town?” I hoped this would be something that a future audience would wonder.
of course, I didn’t know who that audience would be, or how they’d experience the project… Find out how I tackled this problem in Part 7, “Binders of Photos.”
-Luke